If you follow our design-first approach, you can
skip this section. Instead, you can directly create a
block and connect it to a storage later on.
Define storages
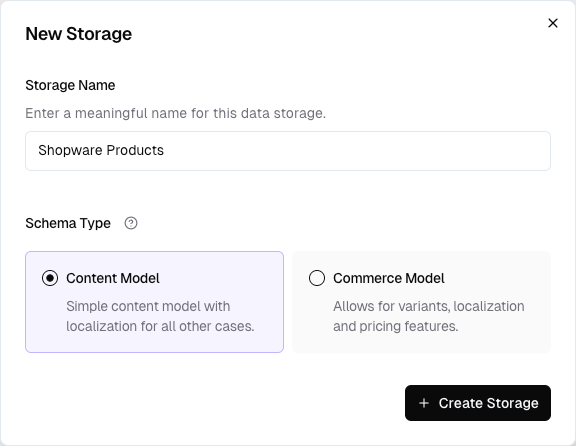
You can create a new Storage by clicking the New Data Storage button in the Data Storages section of your dashboard.Create a new storage
Start by defining a name and selecting a schema type. The type specifies specific features that are available for the storage.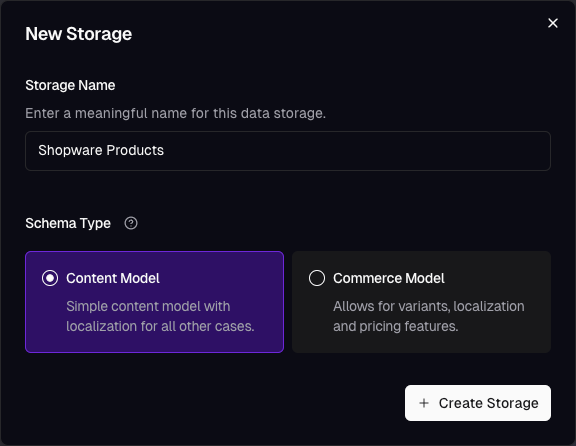
| Type | Description |
|---|---|
| Products | Designed for storing product data, including structures like variants and prices. |
| Content | Used for storing all other types of data. |
key- a unique identifier for the recordactive- a boolean field to enable or disable a record
options- a field to store a list of options that define the variantprice- a field to store the price of the variant
Add fields
Add additional fields to a storage by clicking the Add Field button. You can select from a variety of field types, each with its own properties and capabilities. Refer to the Storage Field Types Reference for an overview of the available field types. Additionally, for each field you can configure the following:- Name - the internal name of the field
- Description - a description of the field that will make it easier for others to understand the purpose of the field
- Array - whether the field is an array. Array fields can contain multiple values of the same type.
- Translatable - whether the field is translatable. Translatable fields can have different values for each language.
- Scoped - whether the field is restricted to a specific scope. Scoped fields can only be used in certain contexts.
- Shared Across Variants - whether the field is shared across variants. Shared fields will have the same value for all variants of a product.
Option Fields
If you’re using the built-inOption composite type, that field will always be an array field. We’re using that structure to create dynamic filters for all options, if you choose this field in a listing.
Populate a storage
You’ve come a “where ends meet” section of the documentation.
We recommend you to first read the Ingest section to understand how to create integrations and data feeds.Here we will only cover how to connect a data feed to a storage.
Connect a data feed
Click Connect on the right side of your storage view to start the process of connecting a data feed.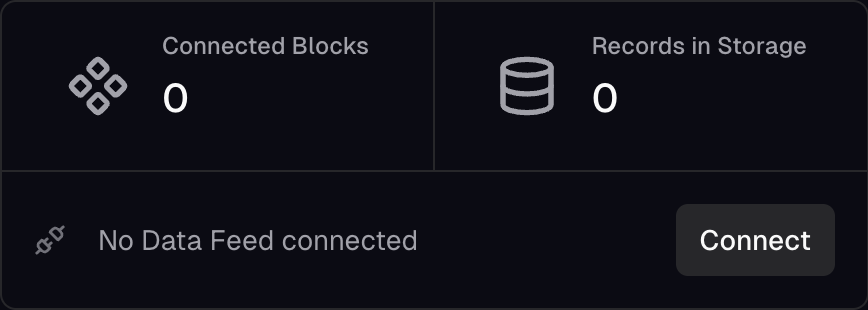

Connect a data feed
Configure the data feed
In the next step, the wizard will ask you to map scopes provided by the integration to your project’s scopes. That involves defining the locale mapping for every scope in your project. Click Save to save the data feed configuration.Configure the storage mapping
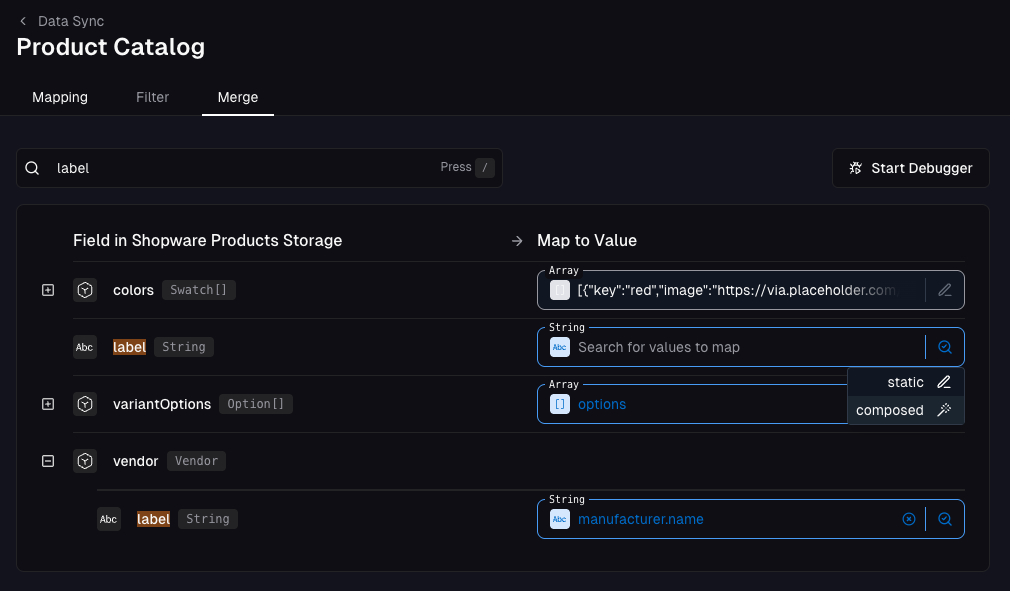
In the final step, you will map the data feed fields to the storage fields. Select the data feed that you just saved and go to theMerge tab to see the fields that you can map.
You are presented with two columns - Storage Fields and Map To Value.
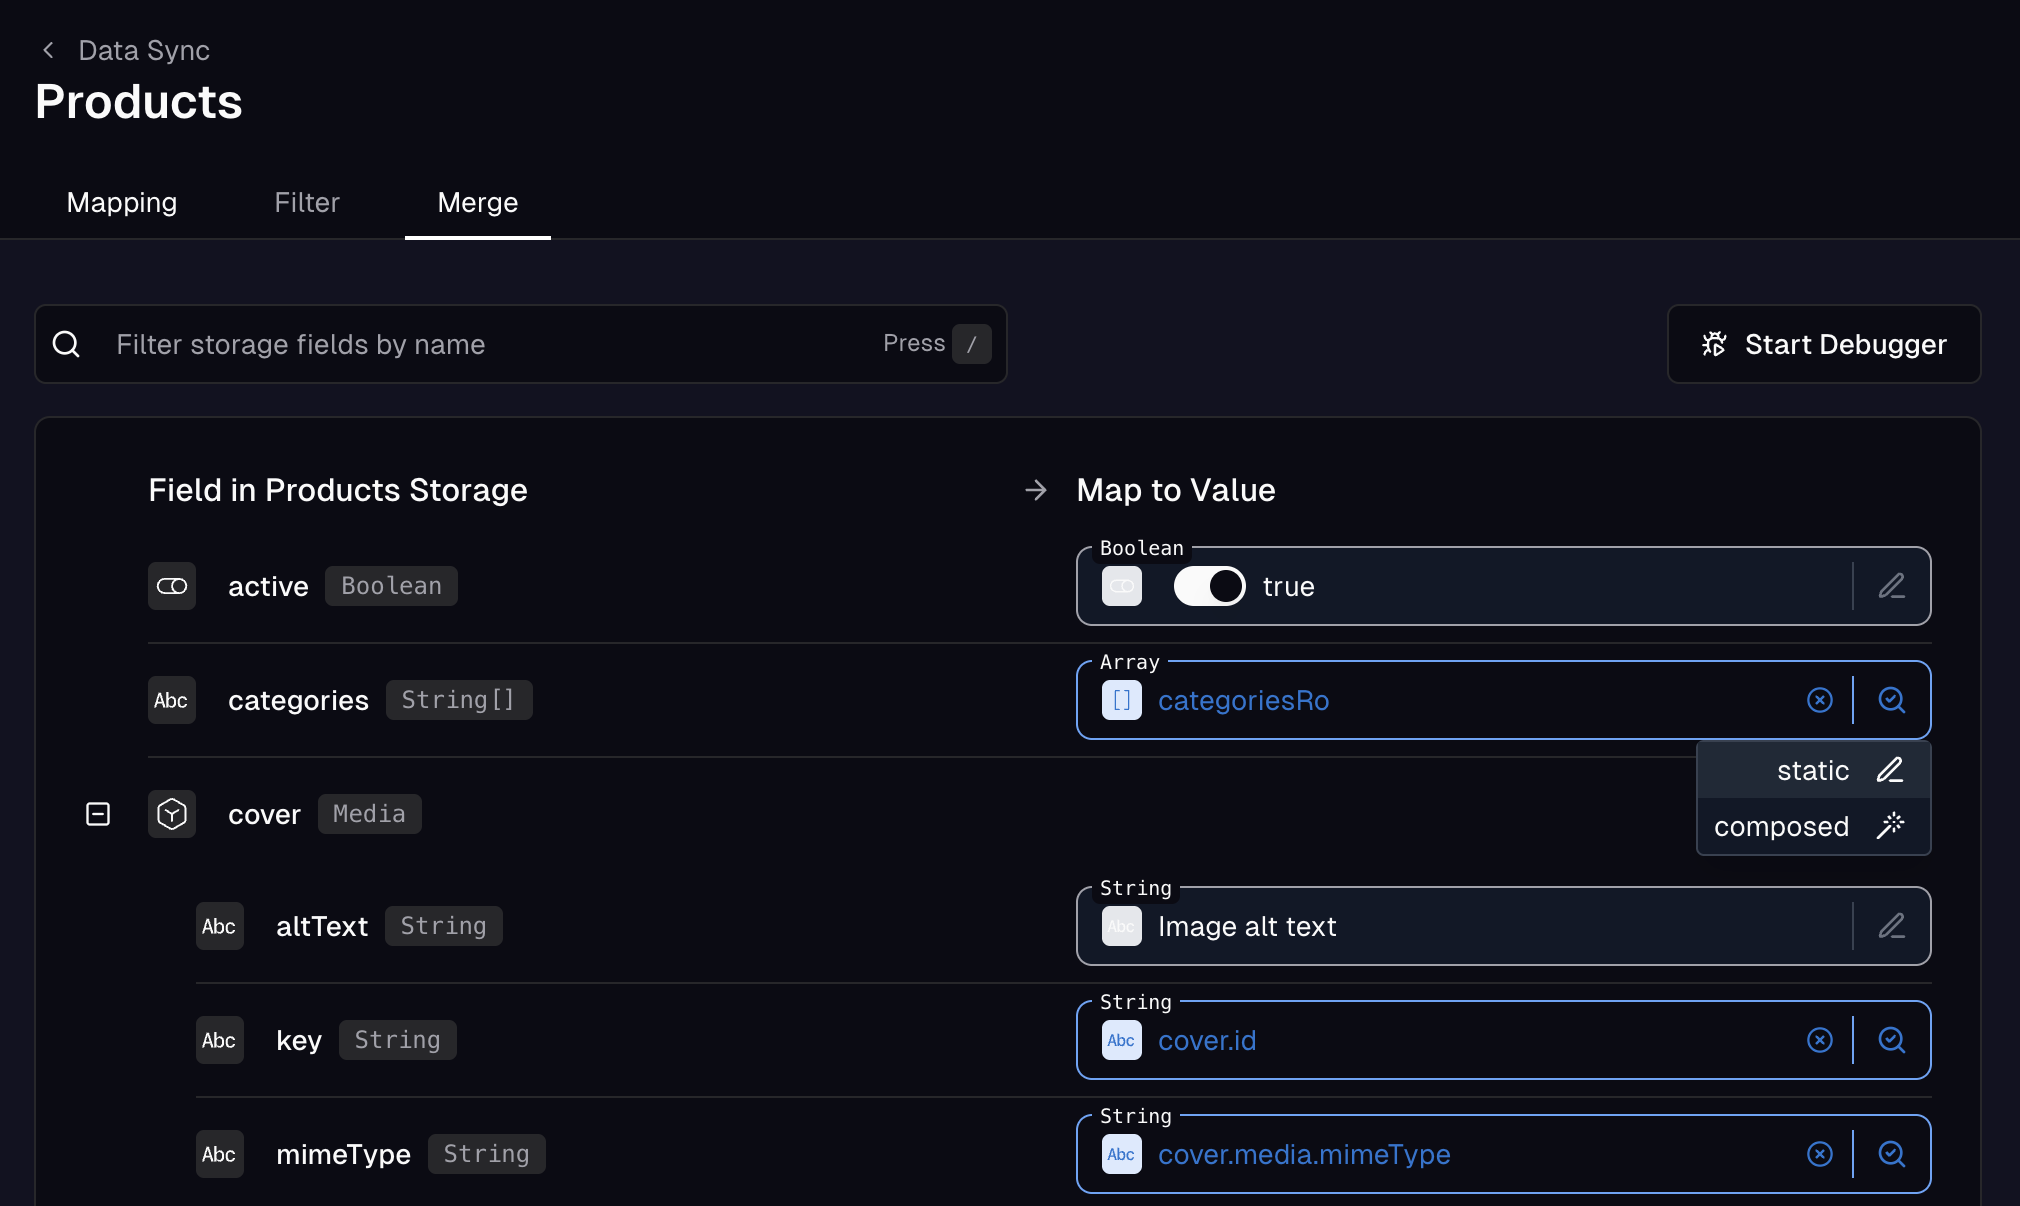
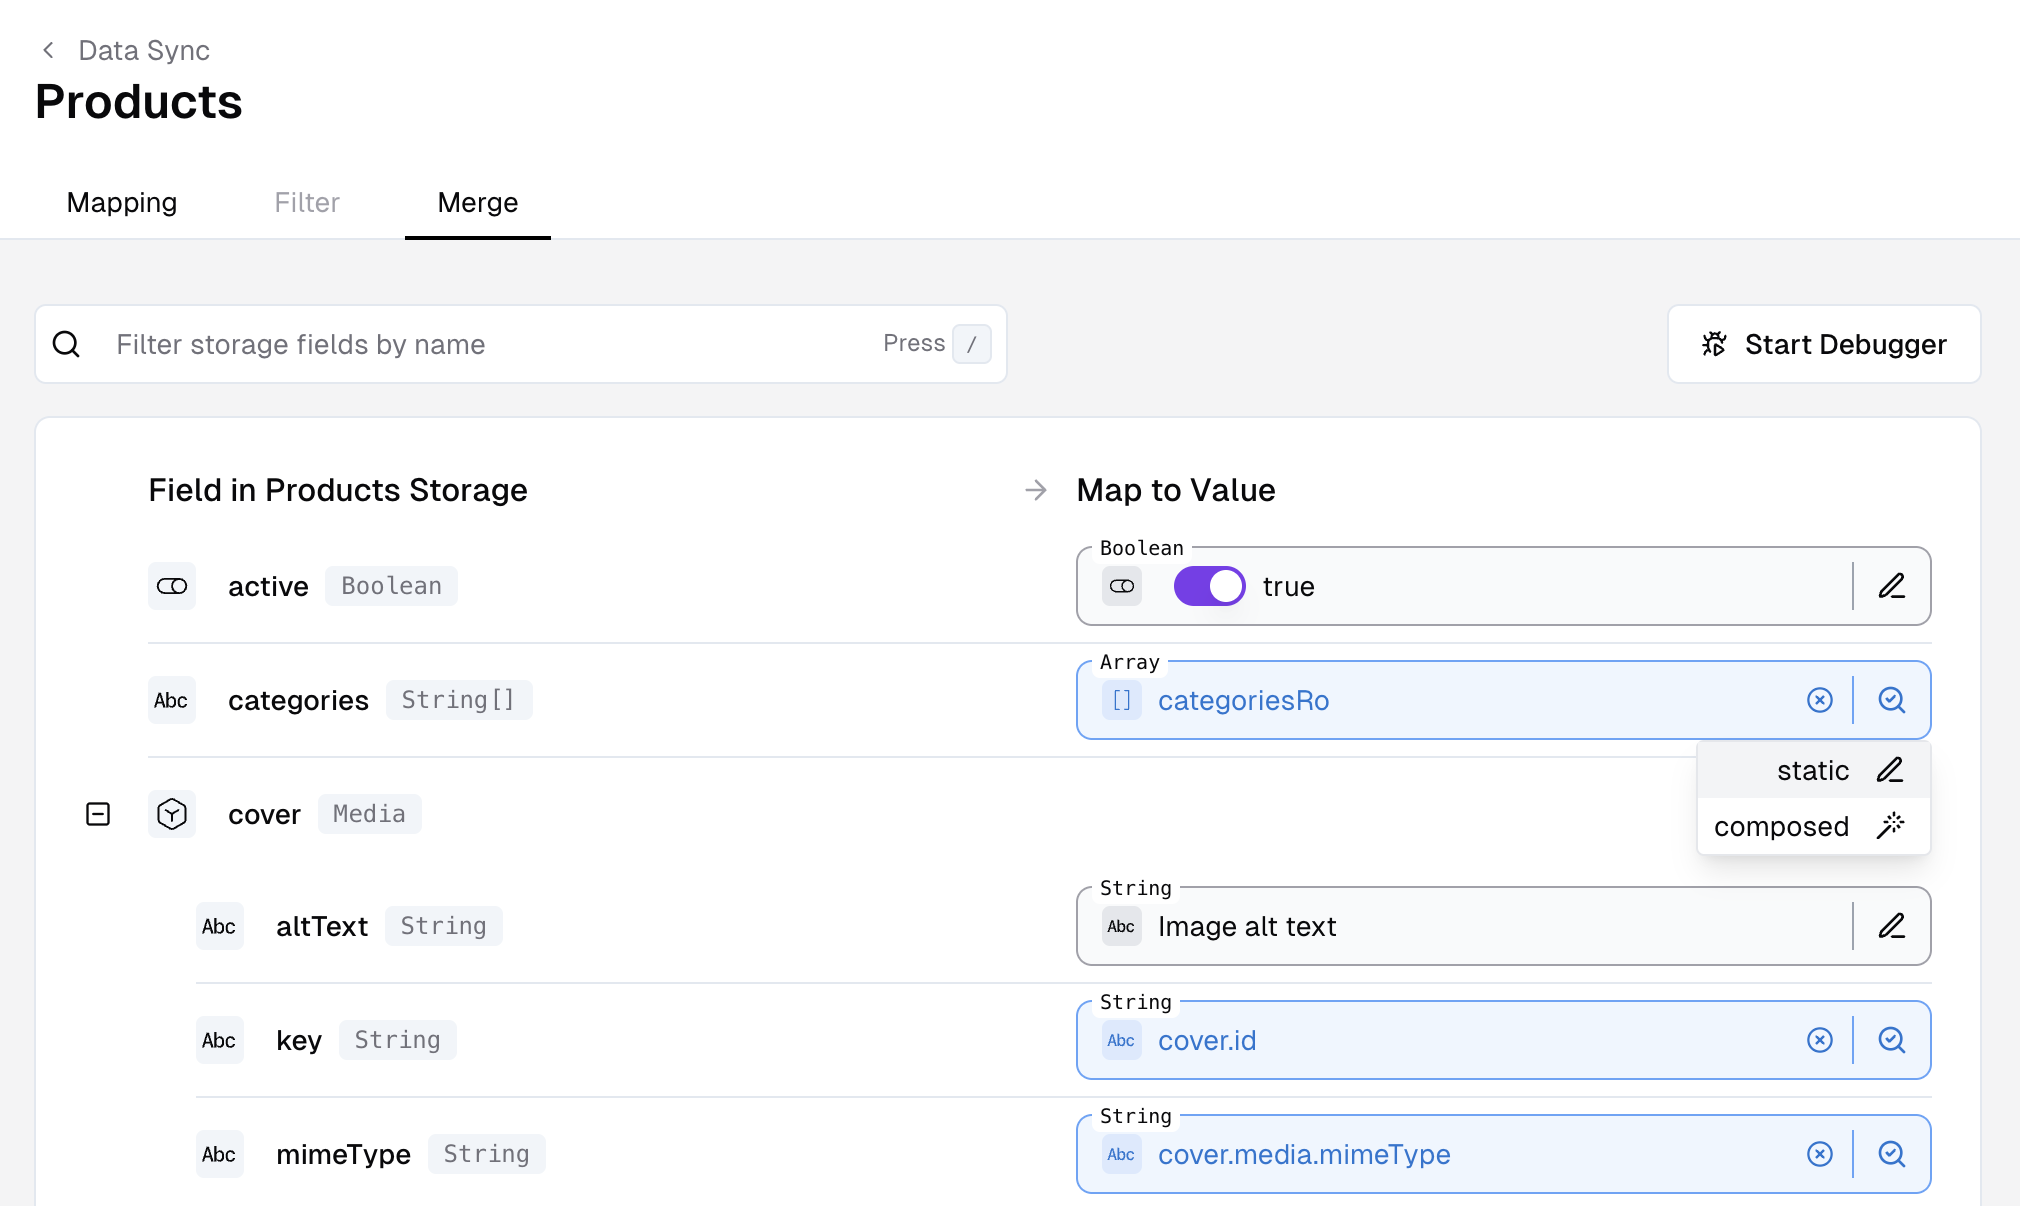
Storage mapping in Data Sync > Merge
- Static Value - a static value that is always the same
- Mapped Field - a value that is mapped from a field in the source record
- Composed Value - a value that is composed from a combination of logical operations and other values (examples below)
Types of value mappings - composed, mapped, static
Examples: Value Compositions
The section below contains examples of how to use the value composition feature to map values from the data feed to the storage fields.Disclaimer for examples - Apple, iPhone, and iPhone Pro are trademarks of Apple Inc., registered in the U.S. and other countries. Used for illustrative purposes only.
Example 1: Concatenate values
A concatenation is a simple operation that joins strings together to create a new string. In our example, we will concatenate thevendor.name and productName fields to fill the storage field label - like “Apple - iPhone 13”.
1
1. Change the mapping mode to `composed`
To change the mapping mode, hover the icon next to the input field.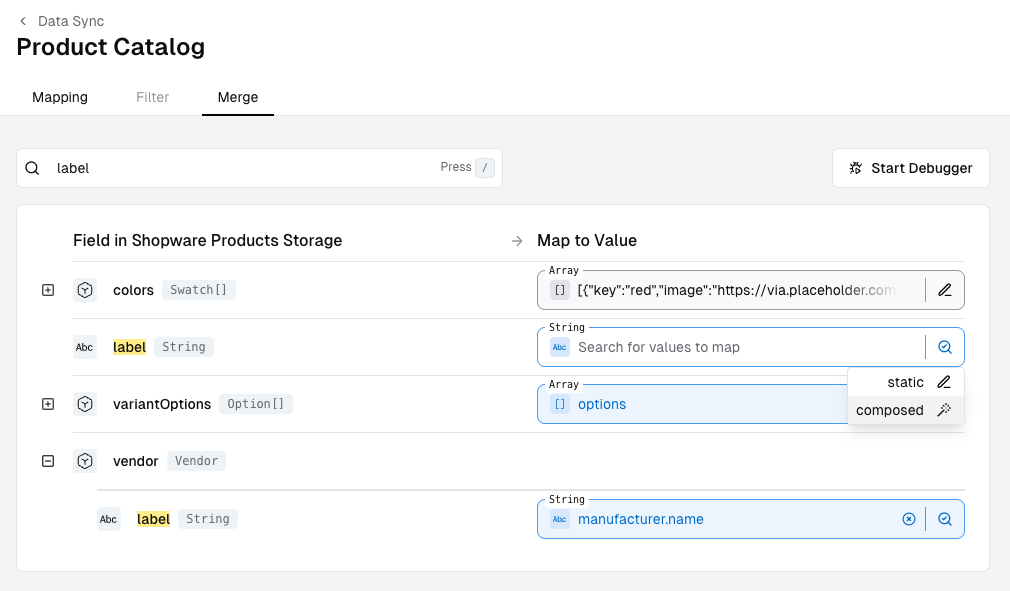
2
2. Add the `concat` function
In the window that opened, select the 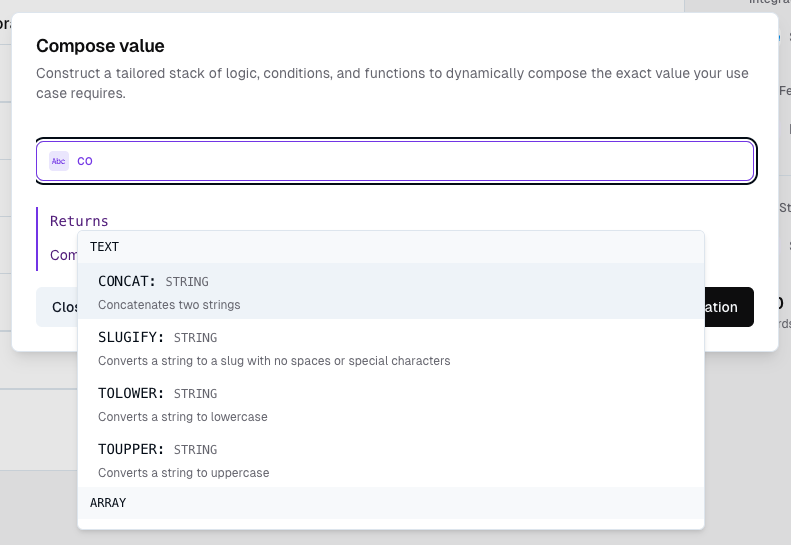
concat operation (you can also search for it)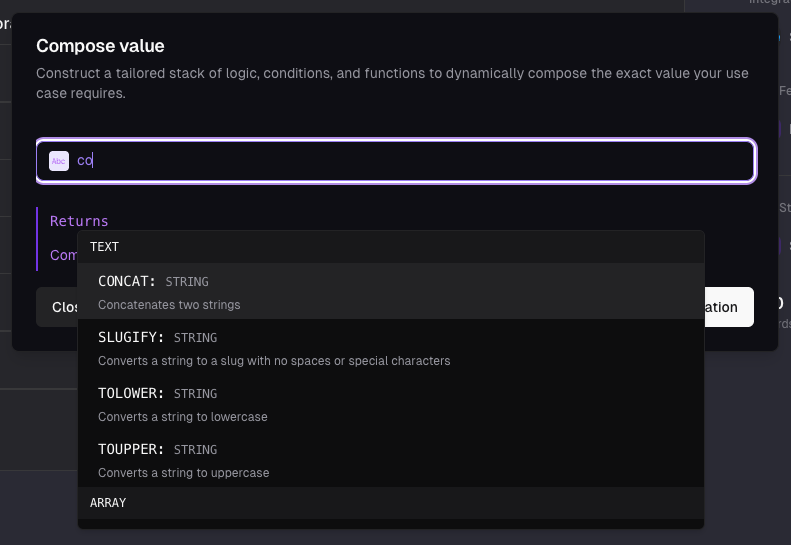
3
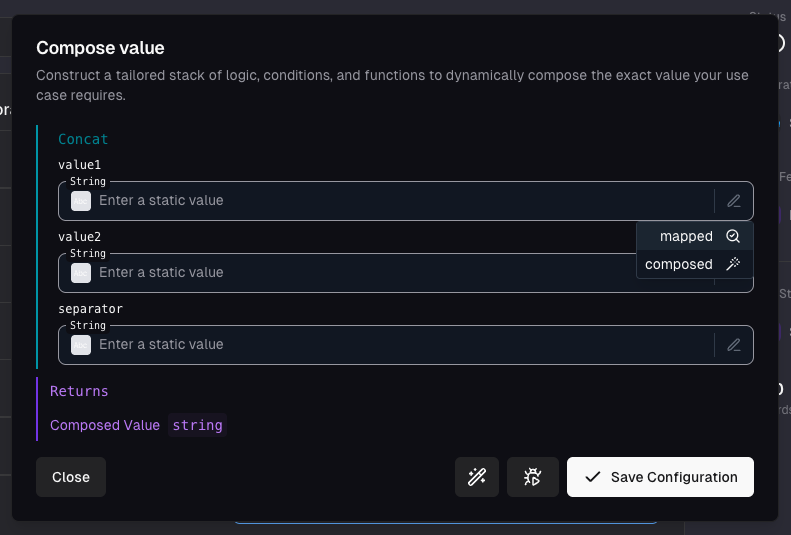
3. Add the fields to concatenate
The view will change and show you three empty input fields (two for the values to be concatenated and one for the separator).Change their mapping mode as you like (e.g. to mapped) and select the fields you want to concatenate.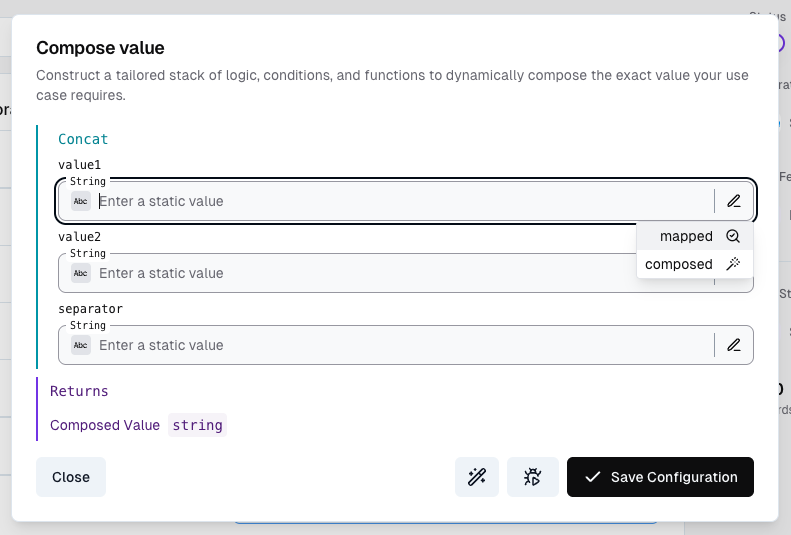
4
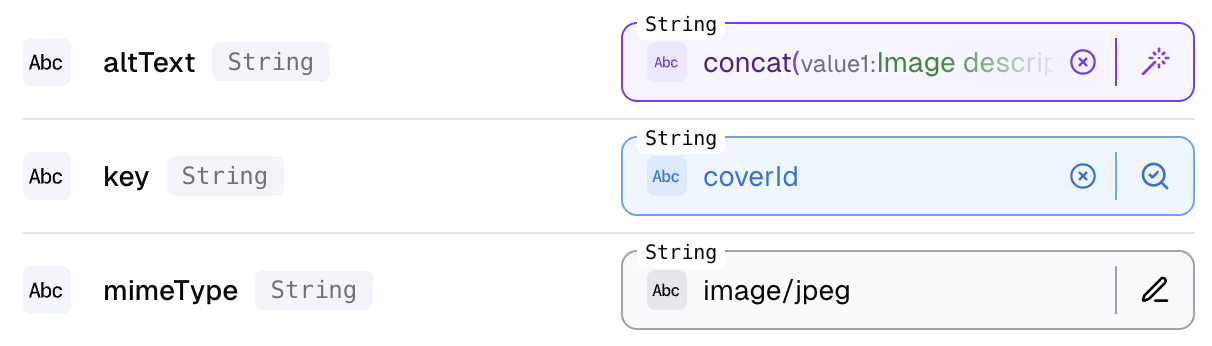
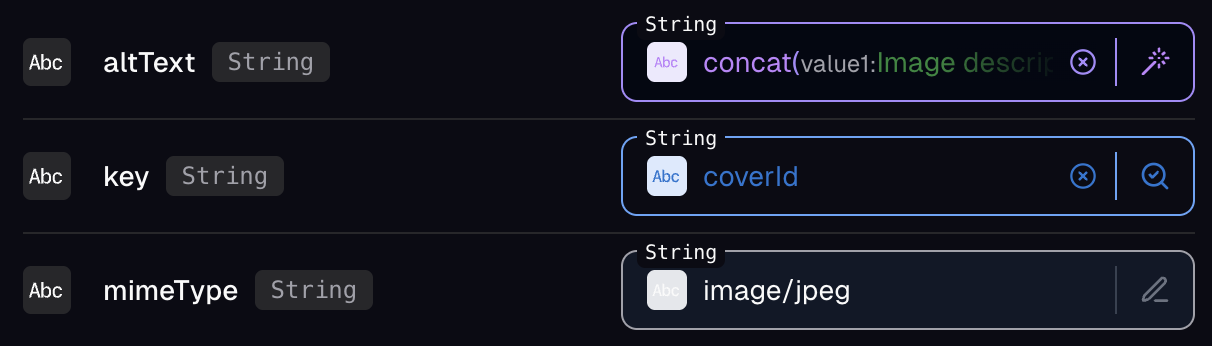
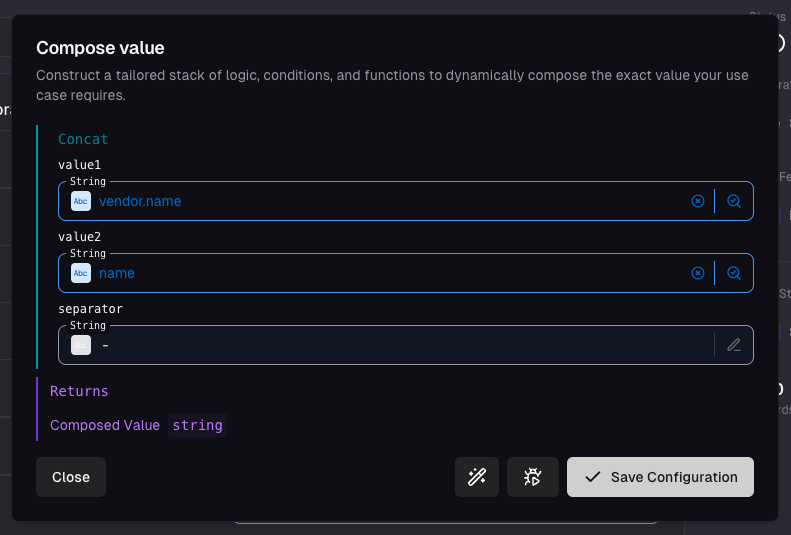
4. Save the configuration
Your final configuration should contain a value for every field of the function.Click Save Configuration to save the configuration.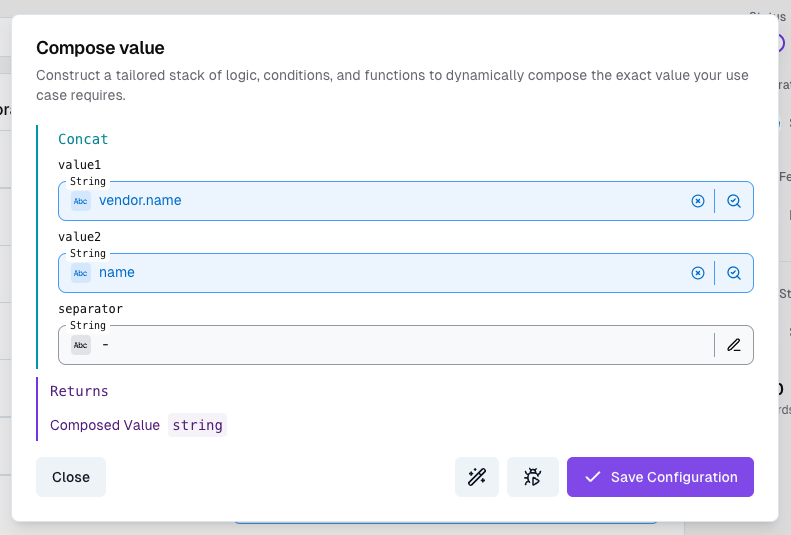
5
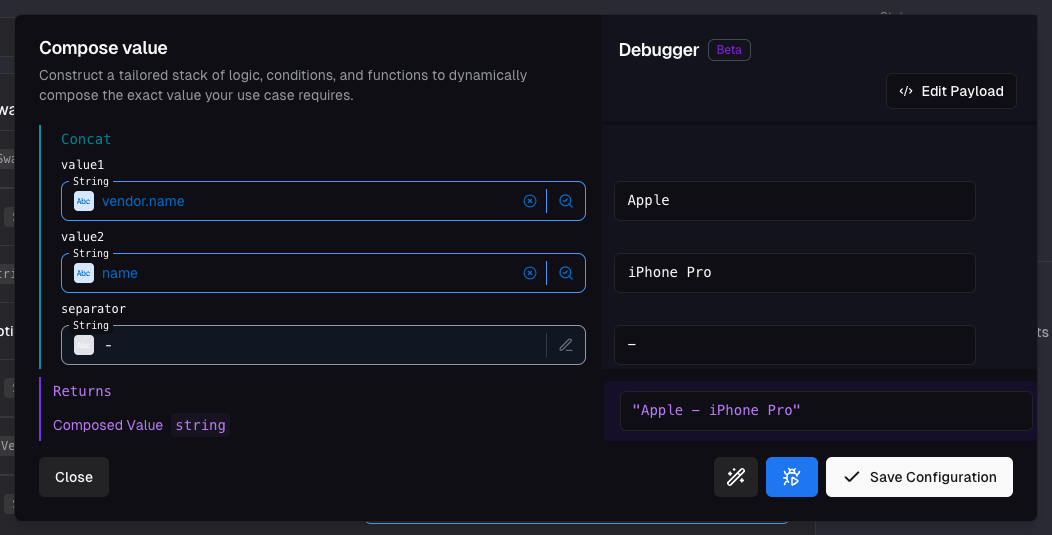
5. Test the configuration
You can test the configuration by clicking the button next to the Save Configuration button.This will open the debugger pane and show you the node-wise output of the composition.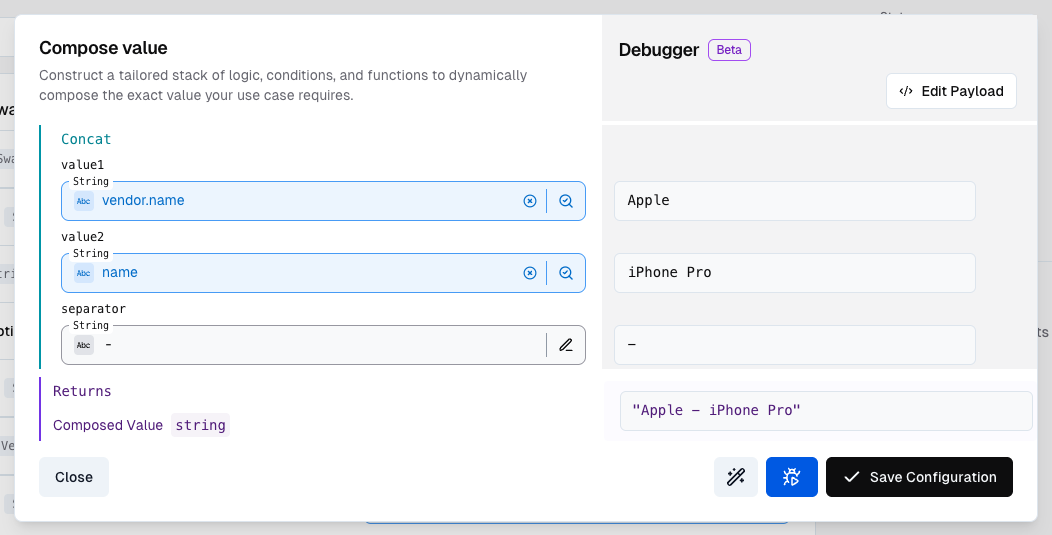
The debugger will set a random record as the input and show you the output.
If you are using a fresh data feed, the debugger will show you an empty output, because there is no data yet.
You can set a custom input by clicking the Edit Payload button.
6
6. Test with custom data or a real record
You can test the configuration with custom data or a real record.
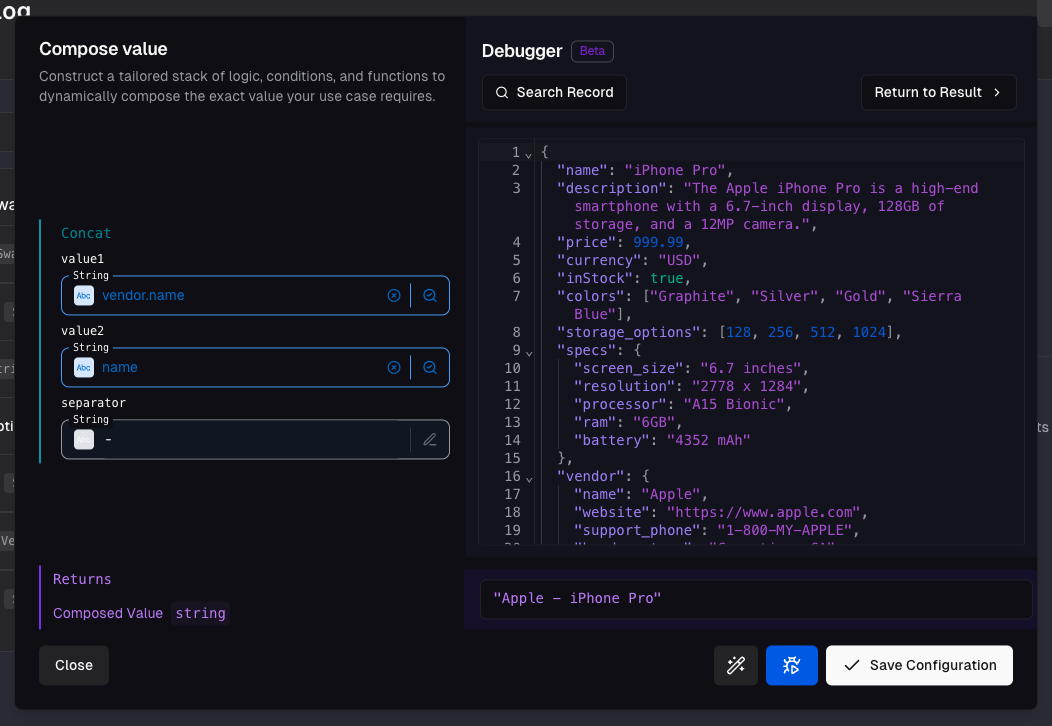
To do so, click the Edit Payload button. You can edit the payload in the JSON format and observe how the output changes.To test with a real record, click the Search Record button and select a record from the list.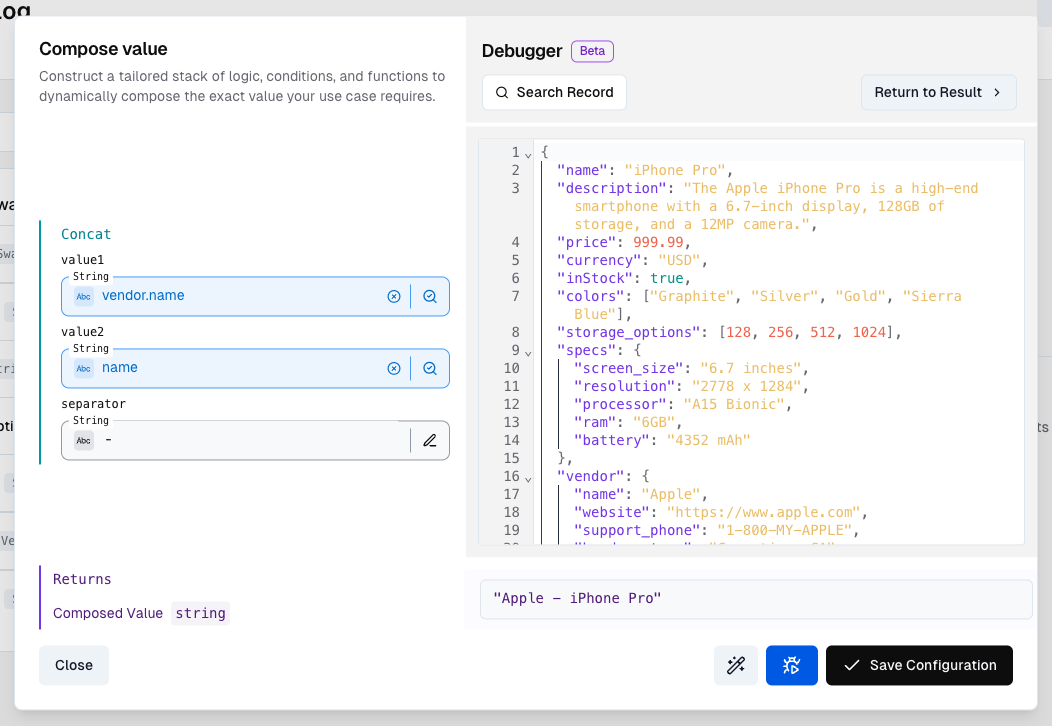
The list of records may be empty. This is because the data feed is not yet populated with data.
Make sure the integration is set up correctly and the data feed is populated with data (e.g. by sending data to the ingest endpoint).
Example 2: Conditions
In this example we will use theif function to conditionally set a value for the availability to ‘In Stock’ or ‘Low Stock’ depending on whether the stock is above or below 10.
1
1. Change the mapping mode to `composed` and add the `if` function
Similar to the previous example, you can change the mapping mode to 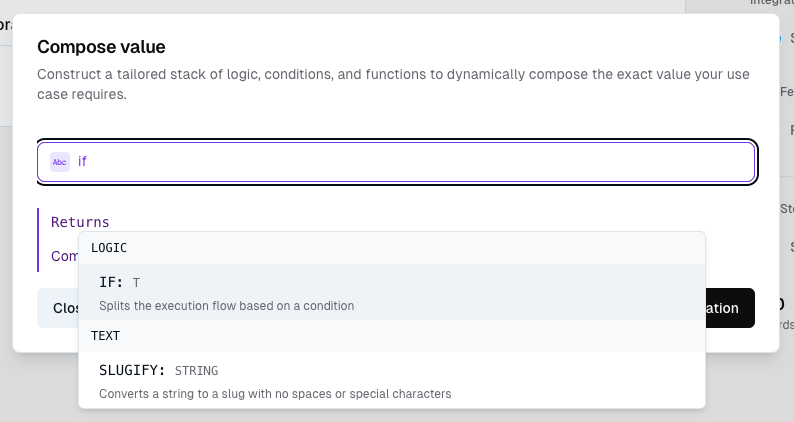
composed and add the if function.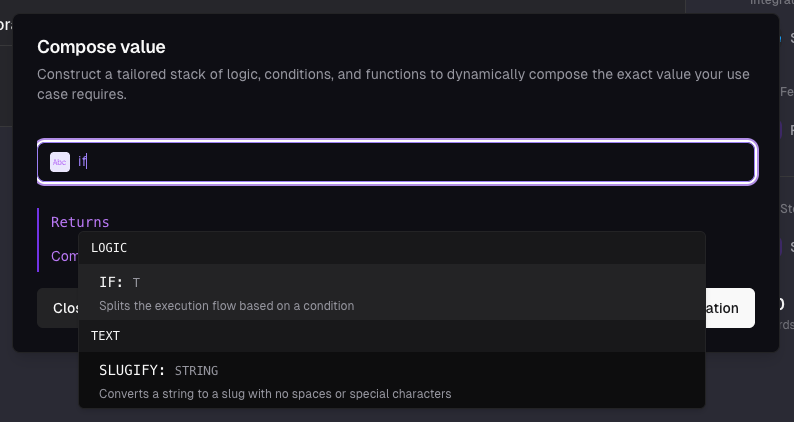
2
2. Add the condition
The 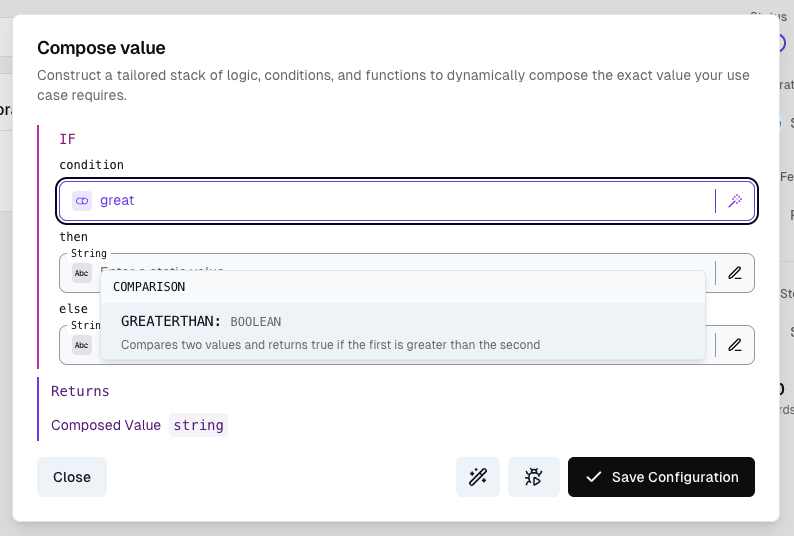
if function takes three arguments:- The condition
- The value to return if the condition is true
- The value to return if the condition is false
composed and add the greaterthan function.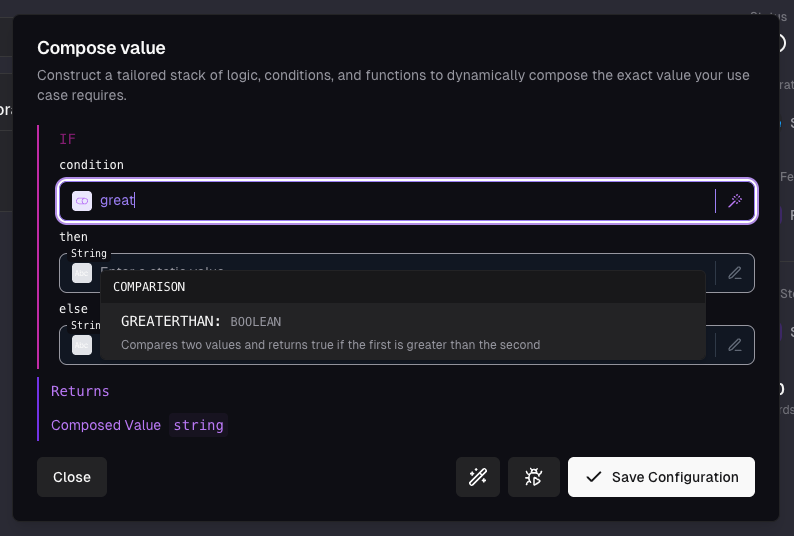
3
3. Configure the arguments
The 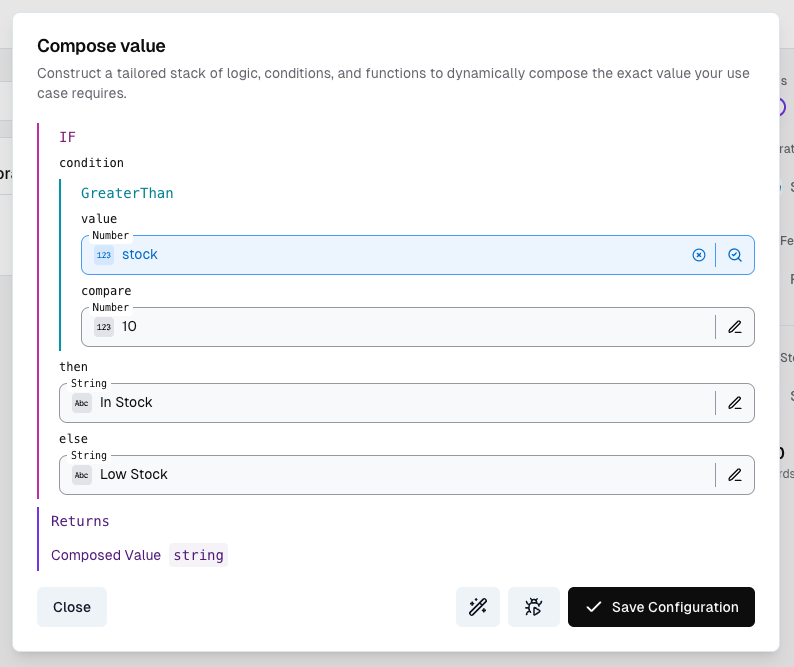
greaterthan function takes two argumentsvalue- the value used as a reference - in our case the stockcompare- the value to compare to - in our case 10
value argument to mapped and the compare argument to static.The screenshot also shows the return values then and else set to In Stock and Low Stock respectively.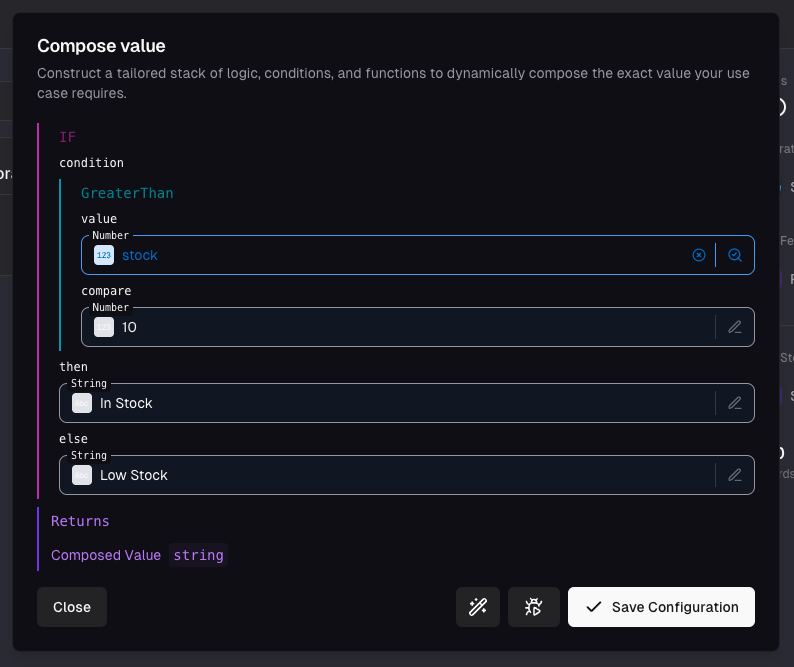
4
4. Test the configuration
Go ahead and test the configuration.Observe how the output changes between “In Stock” and “Low Stock” depending on the value of the
stock field.Example 3: Array Operations
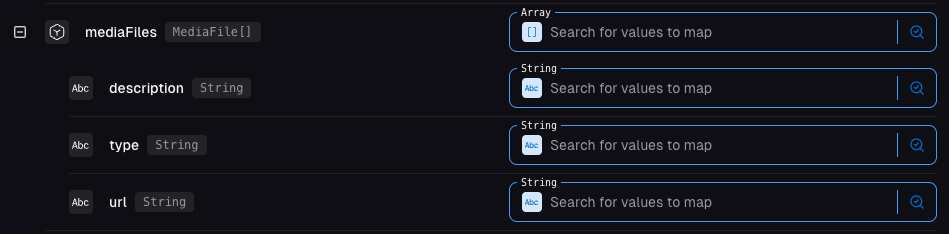
In this example we will transform an array of images into a different format. Our goal is to transform the incoming array of images into a new array of objects with the following properties:description- the description of the image (e.g. “iPhone Pro front view”)type- the type of the image (e.g. “image/jpeg”)url- the url of the image (e.g. “https://cdn.example-store.com/images/[image-id]/gallery.jpg”)
1
1. Analyse the output structure
The output structure is an array of objects of the composite type 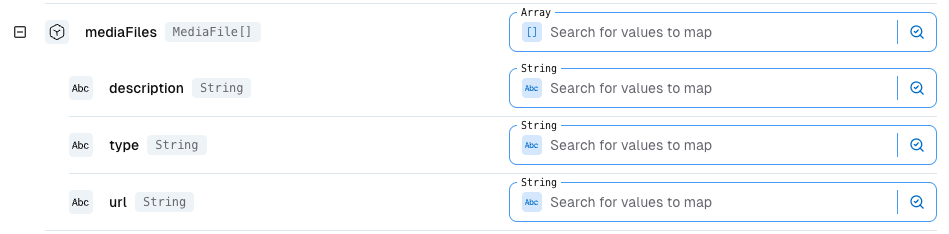
MediaFile with the following fields:description- the description of the image (e.g. “iPhone Pro front view”)type- the type of the image (e.g. “image/jpeg”)url- the url of the image (e.g.https://cdn.example-store.com/images/[image-id]/gallery.jpg)
2
2. Add the reference array
Note how we are mapping an array of objects (not just a nested object).
For that reason, we need to add a reference array that will be iterated over.In our case, the reference array is the 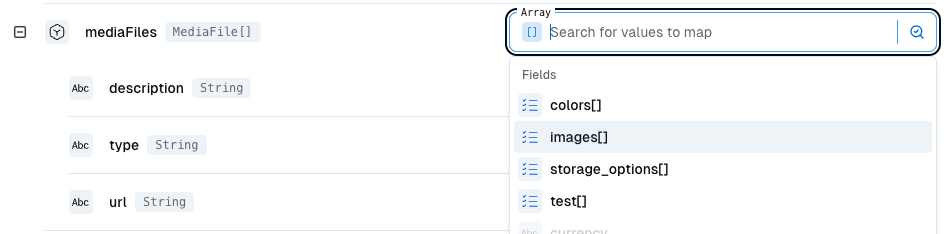
images array from the feed record payload.Don’t worry if the completion is not looking like the screenshot below.
The feed schema may not yet be defined in your project.
You can define it manually in the Integrations > Data Feeds > Schema tab or by sending a request to the ingest endpoint.Instead can just type
images and add the field to the schema manually.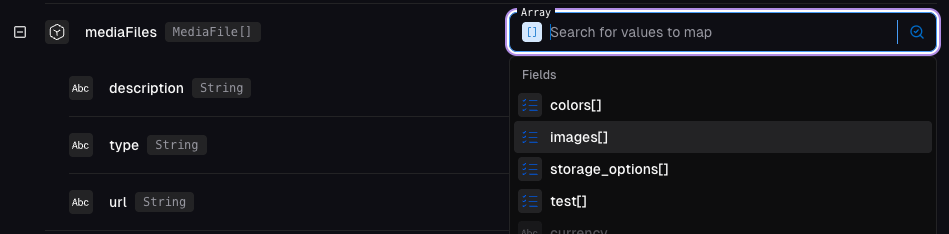
3
3. Map the remaining fields
Now we can map the remaining fields to the composite type.
In order to access the current item in the reference array, we can use the 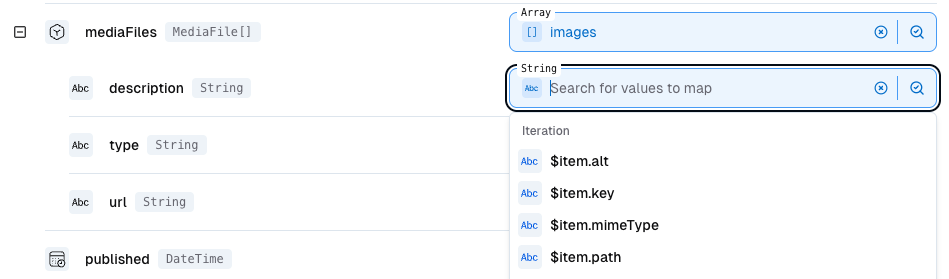
$item variable.You can also nest arrays inside of arrays. If you want to navigate into the upper iteration context, you can use the
$parent accessor.
For example if each image would have a list of versions (e.g. for different sizes), you could access the description of the parent record with $parent.description.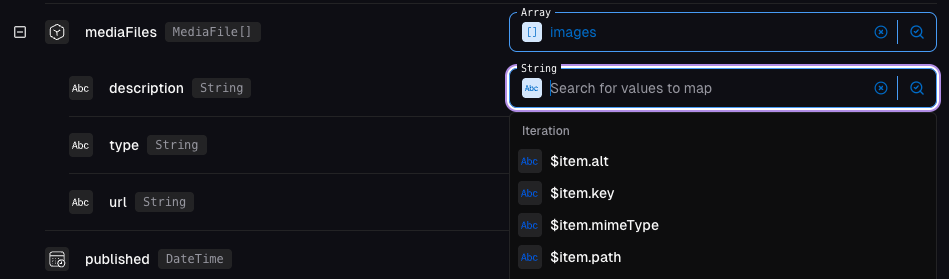
4
4. Test the configuration
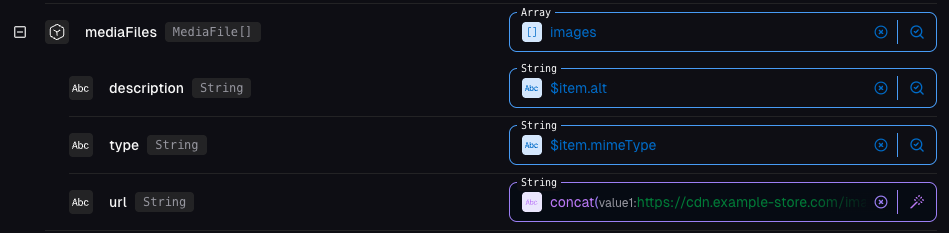
The final configuration should look like the screenshot below.The 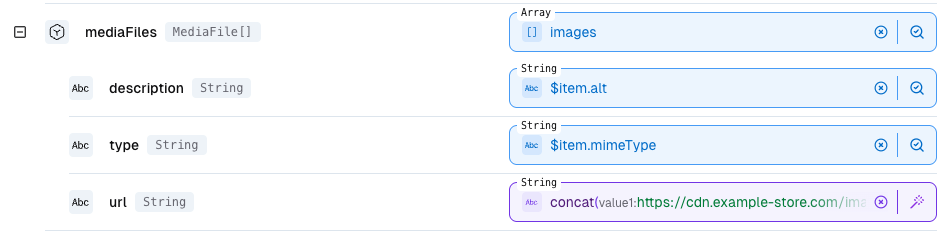
alt and type fields are directly mapped using the $item accessor.
The url field is composed using the concat function, building a string like this (pseudo code):Note how the separator is treated just like any other value - it might feel counterintuitive to put the dynamic value in the separator, but it gives the correct output and illustrates the important concept of value composition.
5
5. Test the configuration
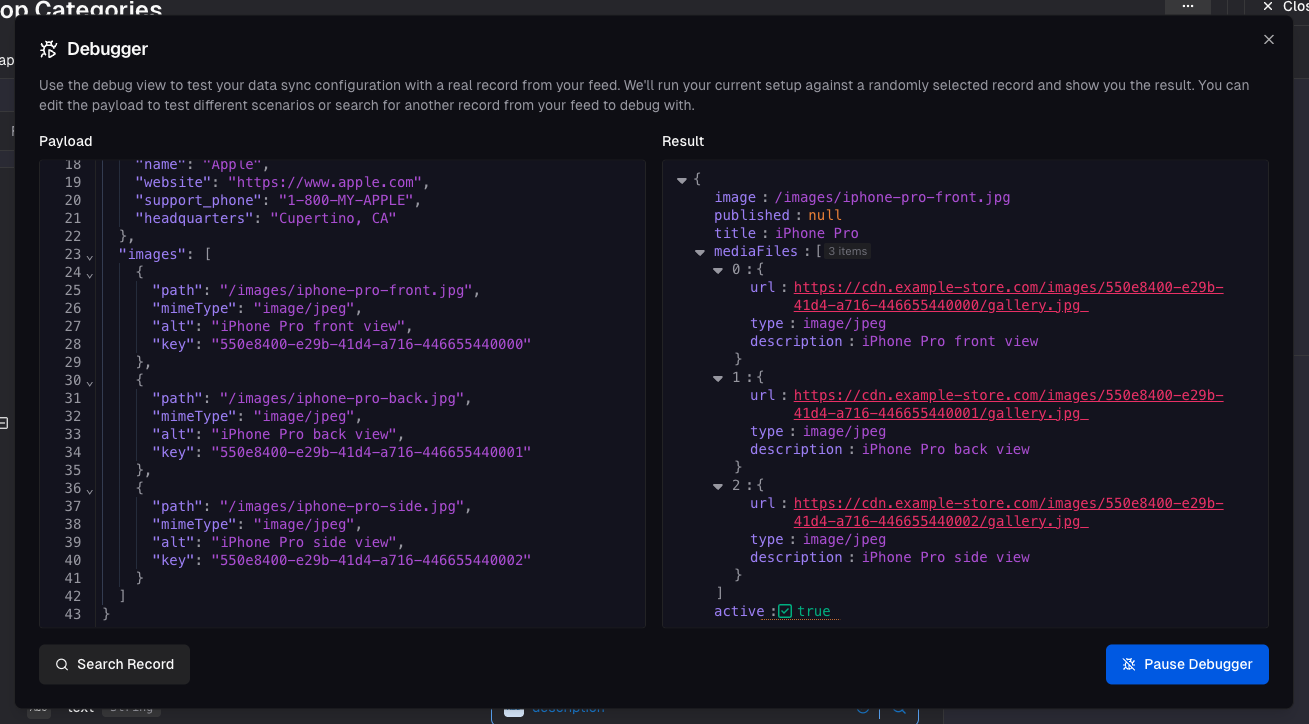
Let’s validate our configuration by opening the record debugger, which can be accessed using the Start Debugger button on top of the storage mapping UI.See how we transformed the source array of 
images into a new array of MediaFile objects.